
Edit a video — from UN Web TV or a file you already have — cut it, caption it, OCHA-brand it. Or just add lower thirds, subtitles and an ending to something you've already cut. Everything runs on your computer; your video never leaves it.
Set up OCHA QuickVid on this computer
OCHA QuickVid works on real video — cutting, transcribing, rendering — so it runs a small engine on your computer: free, sets itself up, no admin rights needed. Install once; this page unlocks by itself and stays up to date. Your videos never leave your machine.
First time on this Mac?
A one-time setup you run in Terminal — about a minute of your attention, then ~10 minutes on its own. No file to double-click, and no security warnings.
- Open Terminal. Press ⌘+Space, type Terminal, press Enter. A small text window opens — that’s normal.
- Copy the command below (hit Copy), click the Terminal window, paste (⌘+V), and press Enter.
- Leave it to finish. It sets everything up (no admin password), then starts OCHA QuickVid and unlocks this page by itself.
curl -fsSL https://raw.githubusercontent.com/UN-OCHA/quickvid_BDU/main/install.sh | bash
github.com/UN-OCHA/quickvid_BDU) and sets it up locally. Nothing is uploaded — your videos never leave your computer. Unsure, or it doesn’t work? Email ochavisual@un.org.When it’s done, OCHA QuickVid lives in your Applications folder (Launchpad + Spotlight) and on your Desktop.
Already installed?
Open OCHA QuickVid — from Launchpad, Spotlight (⌘+Space, type “OCHA QuickVid”), your Applications folder, or the icon on your Desktop. The engine starts quietly in the background and this page unlocks in seconds. No security prompt, ever — it was built on your Mac, not downloaded.
Can’t find it? Re-run the command above — it’s quick when you’re already set up, and it puts the app back in Applications and on your Desktop.
First time on this PC?
Double-click it in your Downloads. It sets everything up by itself (~10 minutes, no admin) — including Python if you don’t have it — and starts OCHA QuickVid when it finishes; this page unlocks on its own.
Your video
Pick the finished video you want to brand — the editing is already done; this mode only adds name strips and the OCHA ending.
- Click the box — a normal file picker opens. Any size, any format, kept full quality.
- Nothing is uploaded — OCHA QuickVid reads the file straight off your disk and it never leaves your computer.
Choose a project folder first — name the job, then press Choose where to save…
Name the job, then pick a location — a folder with that name is created there and the finished video lands in itsexport/ folder, with a README explaining how it was made. Your settings autosave there too, so you can reopen the job later.
.ochaquickvid.json file to reload the video and every setting.
Look — optional footage polish, applied under all branding
Extra settings
Turn on if OCHA blue looks washed out. Most phone footage is corrected automatically.
For Arabic: text and the logo move to the right. Ticks itself when Arabic is detected.
Lower thirds
- A lower third is the animated strip that introduces a speaker: name on top, job title underneath.
- Start = when it appears, as minutes:seconds into the video (e.g.
0:53). Duration = how long it stays — 5–6 seconds reads comfortably. - Alignment: Centre is the OCHA social-media style; Left suits classic 16:9 videos.
- One row per person — Add lower third for more. Don't need any? Leave it empty.
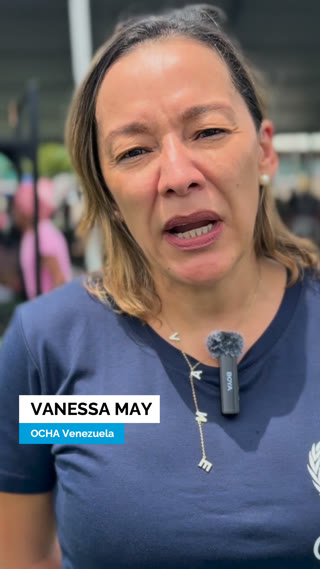
Type the name and job title, when it appears (e.g. 0:53), how many seconds it stays, and left or centre. Add as many as you need.
Subtitles
- OCHA QuickVid listens to the video on your computer (nothing is uploaded), writes down the words, and burns them in as subtitles. Adds a few minutes to the render.
- Two looks, and the format picks one for you: Boxed for reels and 4:5 feed posts, where people scroll muted and the box carries the words — Clean for square and 16:9. You can switch either way.
- Transcription runs on this computer's engine — a long video adds a few minutes to the render.
The spoken words, transcribed on your computer and burned in. On by default: most social video is watched muted.
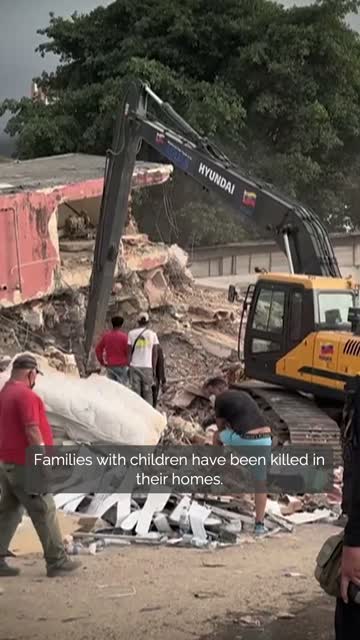
OCHA logo
- The OCHA logo as a small watermark in the top-right corner, on for the whole video — the mark broadcasters call a "bug".
- Typically for event videos (16:9 screens, screenings, livestreams) — social media rarely needs it. Available for any format if you want it.
- Off by default. Turn it on for clips likely to be re-shared or re-cut, so the OCHA source stays visible however it travels.
Watermark, top-right, for the whole video. Typically for event videos; off by default.
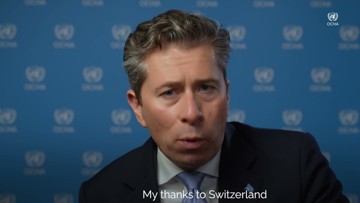
Location
- A location strip top-left: a map pin beside the place (top line) and date (bottom line) — e.g. Ankara, Türkiye · June 2026. It animates in, holds, and animates out.
- The pin icon is on by default; turn it off and the text shifts left to fill its space.
- Pin colour: red normally, or blue if red clashes with the footage behind it.
- Start = when it animates in, as minutes:seconds (e.g.
0:04). Duration = how long it stays (5 seconds is the default). - Need to name a second place later in the video? Add another — each strip has its own text, colour and timing.
Off by default — add a strip only if you want one.
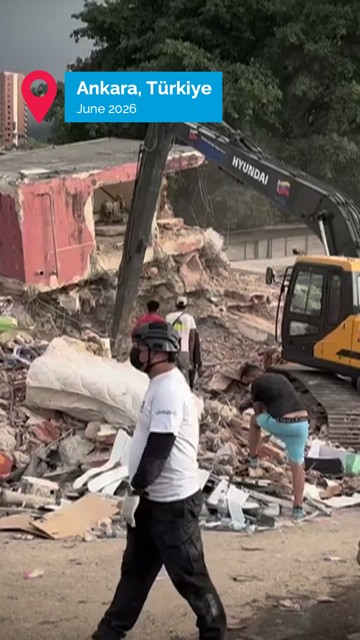
Text on screen
- Up to three lines of large white text that rise in one after another and leave the same way — for a quote, a statistic, or a question.
- A soft readability gradient is placed behind them automatically, so the words hold up over any footage.
- Start = when it rises in, as minutes:seconds (e.g.
0:12). Duration = how long it stays. - Need text at several moments? Add text on screen again — as many blocks as you like, each with its own words and timing.
- Want a fourth line? Use a second block — three lines is the template's design.

Off by default — add a block only if you want one.
Ending
- Over footage — the OCHA logo snaps over your final shot, with the click sound. The standard for social clips; needs about 2 seconds of calm footage at the end.
- Over black — the same logo + click on a black end card, added after your last frame. Use it when the video ends abruptly.
- No ending — nothing added.
Preview
What are you making?
- A statement clip is a principal's remarks — a Security Council or member-states briefing, or a recorded video message — cut down to the key sentences (60–90 seconds), captioned and OCHA-branded.
- Project name: type a name (e.g. “ASG Ukraine Security council”), then Choose where to save — a folder with that name is created there. Everything lands inside — the original download in
source/, the finished clip and thumbnail inexport/, the script ininfo/— and your progress autosaves as a project file with the same name, so you can close OCHA QuickVid and pick the job up later. - Skip it and files go to a temporary spot instead; progress then autosaves only in this browser.
Choose a project folder first — name the project, then press Choose where to save…
Name the project, then pick a location — a folder with that name is created there, and everything lives inside: the download, the finished clip, the thumbnail and the project file (autosaved, so you can resume later)..ochaquickvid.json file to reload everything and keep editing.
The recording
- On webtv.un.org, open the meeting's own page — search its title (e.g. “Security Council … Ukraine”) — and paste that link.
- Works even while the meeting is still live — OCHA QuickVid downloads whatever has streamed so far, right up to that moment. No need to wait for it to finish or request the file separately.
- Just make sure it's that specific meeting's page, not the generic webtv.un.org homepage — the link should end in an ID, e.g.
webtv.un.org/en/asset/k1m/k1mx7fqwrz. - The download uses the floor sound — each speaker's real voice, not the interpreter.
- Already have the video? Pick a file and skip the download.
Paste the link of the meeting's own UN Web TV page (works even while it's still live) — or pick a video file you already have.
Check the lip-sync optional
- UN broadcast feeds often run the sound a few frames ahead of the picture; recorded video messages are usually already fine.
- Play the loop and watch the lips. In sync? Leave it on As is and continue. Slightly off? Try +4f — the usual fix for UN feeds — or its neighbours until the lips lock. Each chip re-renders the same moment with that correction.
- Try another moment tests a different part of the recording — useful when the current preview has no clear talking.
- Your choice is baked into a working copy; the original download stays untouched.
Broadcast feeds sometimes run the sound a few frames early — a recorded video message is usually already fine. Play the test; if the lips match, leave it on As is and continue. If they drift, try another offset until they lock.
Find the words
- Transcription is the slow part — narrowing it to just your speaker keeps it to a few minutes.
- Scrub the recording; when your speaker starts, click Set "From" here. Scrub to where they finish → Set "To" here. (Typing the times works too; the ▲▼ arrows nudge by 15 s.)
- Do they speak in two separate blocks — say an opening statement and a later reply? Add another range for the second block; all windows are transcribed and the sentences merge into one list.
- Leave the times empty to transcribe the whole recording (slow for a long meeting).
Scrub to find your speaker, then Set "From"/"To" for the block they speak in (or type the times). Speaks in more than one place? Add another range — each window is transcribed and the sentences merge into one list. Leave the times empty for the whole video.
Speech in another language comes back as English captions, which you review and edit as usual. English only — it can't translate into other languages.
Choose what they say
- Every sentence found in your window is listed with its length. Tick the ones that carry the message — the counter above the list keeps the running total. Aim for 60–90 seconds.
- Sentences that follow each other play as one continuous take — natural pauses kept, no cuts. Only when you skip ahead does OCHA QuickVid cut, hiding the jump with a punch-in (a framing change, broadcast style) and marking the captions with [...] so viewers see words were skipped.
- The C / G buttons force a Close-up or General shot for that sentence; leave them alone and the tool alternates sensibly on its own.
- Spotted a transcription typo? Click the text and fix it — that changes the captions only, never the audio.
- Use AI to pick the sentences: copies a ready-made prompt with the whole transcript. Paste it into Microsoft Copilot (or any AI chat), answer its questions (key messages, target length — attach the statement if you have it), then paste its answer back and the right sentences tick themselves. You still review and adjust.
Tick the sentences that carry the message — aim for 60–90 seconds. Consecutive sentences play as one take; jumping ahead becomes a clean punch-in cut with [...] in the captions. You can fix small transcription slips in the text (captions only).
Format & framing
- Pick the destination: Reels (9:16 portrait) for Instagram/TikTok, Square (1:1) or IG / FB feed (4:5) for feed posts, Event screen (16:9) for halls and webstreams — its captions are clean text over a soft gradient instead of boxes.
- Two crops of the same footage: General (the main look) and Close-up (the punch-in used at jumps). Each is its own little editor — drag the picture to reposition it, and use its zoom slider to go tighter or wider. What you see is exactly what renders.
- Some directions are locked by geometry — e.g. a portrait crop of a landscape video already uses the full height, so it only moves sideways until you zoom in. The grey note under each preview tells you.
- Zooming far softens the picture (the source has only so many pixels) — the note warns you near the limit.
- The previews show a frame from your first kept sentence; Try another frame jumps to a different moment if that one's a wide or in-between shot.
Event screen only, and only when your source is 4K. Everything keeps the same proportions, just larger. Not for social media: Instagram, TikTok and X re-encode to 1080 anyway.
Drag each picture to reposition it, and use its zoom to go tighter or wider — the two frames are independent. The previews use a moment from your first kept sentence; Try another frame shows a different one.
Titles & ending
- A lower third introduces a speaker: name on top, job title under it. One row per person — Add lower third for more.
- Start = seconds into the finished clip; Duration = seconds on screen (5–6 reads well). 2nd line adds a second title line — e.g. a Spanish translation for a bilingual strip.
- Subtitles: the speaker's words, burned in — keep ON for social (most people watch muted). Two looks: Boxed for reels and 4:5, Clean for square and 16:9. The format you picked in step 6 sets it; the preview shows each.
- OCHA logo: a small watermark, top-right, on for the whole clip — typically for event videos (social media rarely needs it). Off by default; available for any format.
- Text on screen: up to three big lines that rise in and out, over an automatic readability gradient. Add as many blocks as the video needs — each has its own words and timing.
- Ending: Over footage = the OCHA logo snaps over the closing shot with the click sound (the standard). Over black = clean black end card. No ending = finish on the last words.
- Footage after the last sentence: with Over footage, the picture keeps rolling for a moment under the logo while the sound fades to silence — whoever speaks next in the room is never heard. If your speaker closes with "I thank you", keep that sentence ticked so it's heard.
A lower third for each person on screen. Start = seconds into the finished clip; Duration = seconds it stays.
Subtitles
Their words, burned in. Keep ON for social: most people watch muted.
Look — optional footage polish, applied under all branding
Extra settings
Turn on if OCHA blue looks washed out. Most phone footage is corrected automatically.
For Arabic: text and the logo move to the right. Ticks itself when Arabic is detected.
OCHA logo
Watermark, top-right, for the whole video. Typically for event videos; off by default.
Location
Off by default — add a strip only if you want one.
Text on screen — up to 3 lines per block that rise in and out; a soft mid gradient goes behind them automatically
Off by default — add a block only if you want one. Add as many as you need.
Ending
Preview & download
- Watch it start to finish — check the first caption, the lower-third timing, each cut, and the ending.
- Chose a job folder in step 1? The clip is already saved in its
export/folder (the exact path shows below the player). Download MP4 saves another copy via the browser. - Thumbnail: a clean still for the post cover — same size as the video, no branding. Click the frame you like, then Download thumbnail (it also lands in
export/). - Need a change? Scroll up, adjust any step, and hit Create the statement clip again.
Thumbnail
Three clean stills (no branding), same size as the video — click the one you like. None good? Show 3 more, or scrub the preview above to any moment and use that frame — every frame of the clip is available. Tip: pick a frame with the mouth closed.
Use AI on the sentences
The wording doesn't have to match the transcript exactly — a written script never does. Anything the AI can't place is reported back, never silently dropped.
Numbers from the list. These are locked — if they overrun the target duration, the duration gives way.
Optional — greetings, procedure, anything you've already ruled out.
Off by default. On, it asks about key messages before choosing.
-
Copy the prompt — it contains the full transcript and instructions.
This transcript is long — some AI chats truncate big pastes. If the AI seems to miss sentences, narrow the transcription window in step 4 and try again.
- Paste it into Microsoft Copilot (or any AI chat) and press send.
-
Copy the AI's final answer and paste it here:
You're sharing the transcript text with your AI tool — fine for public meetings; think twice for embargoed or unpublished content.